6 Steps To Create Your First Product Academy

Highlights:
- Step 1: Inventory
- Step 2: Structure
- Step 3: Start Writing
- Step 4: Quizzes
- Step 5: Academy Settings
- Step 6: Before You Publish
- Key Takeaways

So you’ve decided to create your first product Academy to educate your customers, and now you wonder where to begin. The first logical step would be to start writing lessons, but that’s actually not the first thing to do. Let’s start from the beginning.
Step 1: Inventory

To save you time and money on writing content for your Academy, first, you need to have a look at what information you already have about your product. Chances are you already accumulated quite a lot of information about your product in different forms:
- You probably have a FAQ section on your website.
- You might even have a knowledge base or product resource section.
- If you have done some PR activity, you surely have a whitepaper or press releases.
All this information can and should be repurposed into lessons of your Academy. Your goal at this stage is to evaluate which parts of this knowledge you are going to use and store them separately.
Hint: Consider creating a text document with your lessons and a separate folder with your non-text assets: images, videos, etc. Do this for each course of your Academy.

Step 2: Structure
When you have your initial content sorted out, you should start working on your Academy structure. You want to give a good thought to how you will group your lessons.
Lesson grouping is important since it will determine the educational journey of your learners. For example, you can group your lessons according to difficulty — easy topics and product features go first, then you gradually raise the difficulty level. This approach will work well if you want to help your users learn all your product features in parallel.
Another way to group lessons is by specific topic or product feature — you create lessons about a certain feature and how to use it, starting from the introduction to the feature and finishing with the most complicated examples of what can be achieved using it.
The same goes for creating courses by topics — pick one and create lessons covering all the aspects of that topic, from easy to expert level knowledge. This approach will be useful if you wish to provide in-depth knowledge rather than go broad.
Hint: If you wish to combine these two methods, you can use the Course Folder or Course Group features of AcademyOcean. For example, you can have a Course Group with in-depth knowledge about a specific topic and a Course Folder with courses covering a wide range of knowledge across all your product features.
We recommend starting your first Academy with a couple of broad courses about your product. One can be for beginners to help them with product adoption and onboarding, and the other one can be for your existing users, where you will remind them of all your product features and how to use them on a more advanced level.

Step 3: Start Writing
Now that you have the initial material to work with and you’ve decided how you are going to organize your courses, you need to start creating lessons. But make sure to pick the right person to do it.
Yes, it’s important that the person making the lessons has the following skills:
- They have knowledge of your product or niche. This will greatly speed up the process.
- They can learn new information in a short time period. This can also help overcome the lack of initial knowledge.
- They have experience in writing or teaching. Probably the most important skill — they must be able to translate the knowledge to your learners through lessons.
Begin with a draft
Start creating your first course draft, but remember, although AcademyOcean has an easy-to-use editor, it is a tool for customer education, not for professional copywriters and editors. Therefore, you will probably be more comfortable using Google Documents, Microsoft Word or a similar tool while editing your first lessons.
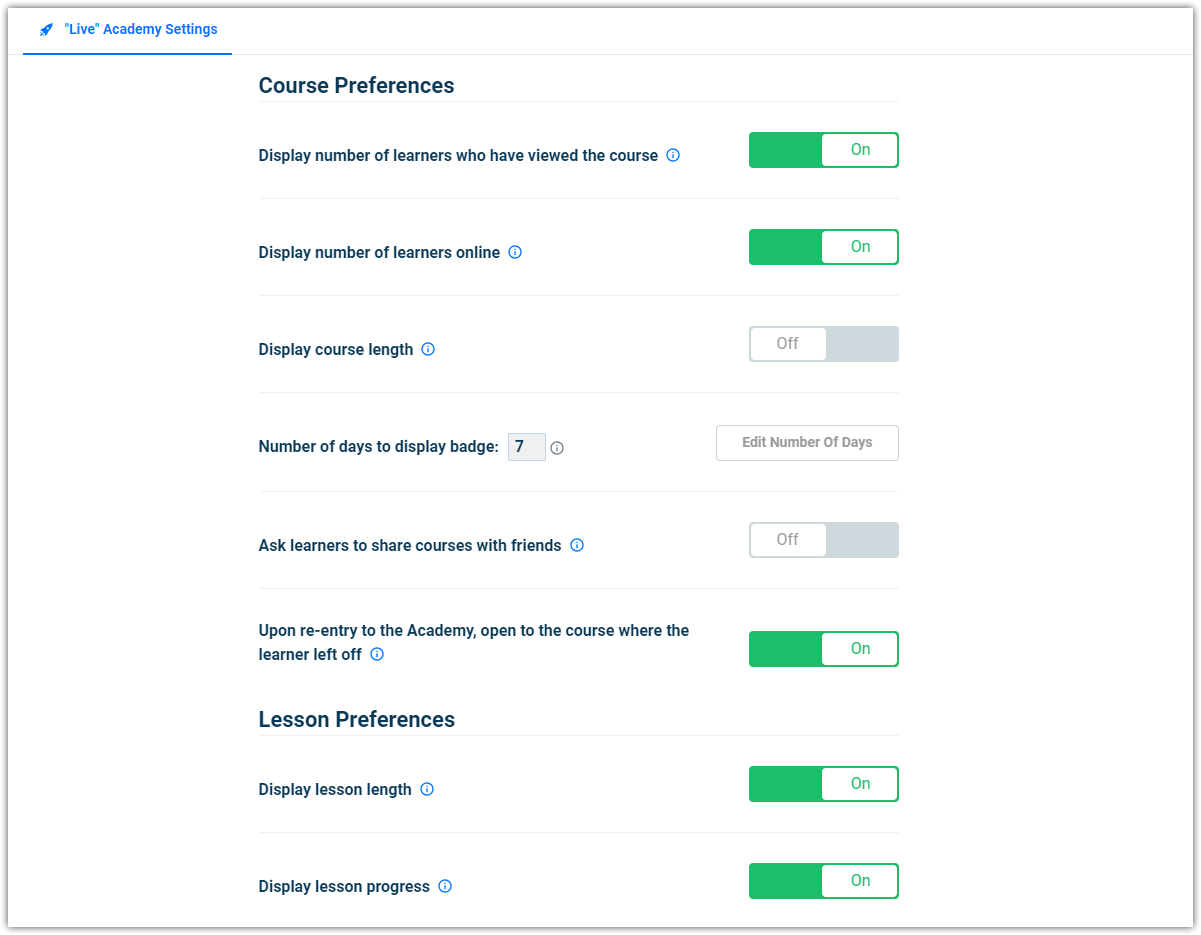
Hint: Try to keep your first course under 10 lessons, with each lesson about 5-10 min long (turn on “Display lesson length” in your Live Academy Settings).

If possible, at first, try to avoid adding images and other non-text content to your lessons, as well as complex sentence structures. Keep it simple, but don’t sacrifice crucial knowledge. After the draft is complete, you should review it and if you feel that it does the job, i.e., sufficiently explains the topics it was meant to cover. Then you can go on and strengthen it with screenshots, videos, charts, etc.
Do not be afraid if you need several revisions of your first course, that’s normal. Remember your goal — your learner must see and feel the value each lesson brings, not frustration about the complexity of your sentences.

Step 4: Quizzes
Do not forget about our Quiz feature. You want to know if your users actually learn something instead of simply clicking through your Academy — this is paramount for customer success. You can, once again, use different approaches here.
Short quizzes
You can have 2 to 3 short quizzes after a couple of lessons each. Ask your learners questions about the topics you covered and present them with several answers to choose from.
One final quiz
Alternatively, you can have a comprehensive quiz at the end of the course. You can even ask for feedback about the course in the form of a question with a free-form answer.
Hint: Remember to check statistics for your Academy to see how your learners are interacting with your courses, lessons, and quizzes, what is their progress.

Step 5: Academy Settings
Now you can transfer the final revisions of your courses into AcademyOcean. It is super easy, just copy-paste your content from your working document. Everything will be transferred into our editor, including formatting and images.
Now you should go through all AcademyOcean settings and make sure everything is configured properly. Pay close attention to the Live Academy Section we mentioned before — these settings affect the learning process the most.

Step 6: Before You Publish
One final step left — go over your Academy as a learner. Put yourself into your learner’s shoes and read every lesson and every quiz you’ve created. Ask yourself:
- What did each lesson teach me?
- Was it easy to understand the lessons?
- Was there enough visual content?
- Are the quizzes too hard, too easy or challenging enough?
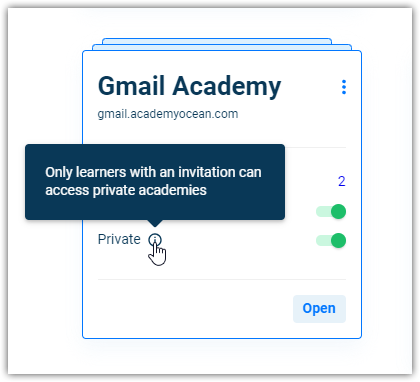
You can also beta test your Academy on some of your current users. Make your Academy private for the time being and invite specific people to go through your courses.

After they give you feedback, you can publish the Academy for everyone or go back and improve it.
Key Takeaways
Let’s sum things up:
- Before creating an Academy, review the information you already have.
- Imagine and understand the structure of your future courses.
- Choose the right person to create your lessons.
- Don’t forget to test your learners.
- Make your Academy look and feel great by tweaking the settings.
- Do closed testing of your Academy before going live.
Although it’s only six steps, creating an Academy can still be a challenge. However, once you launch your first course and feel the benefits of customer education you just might find it hard to stop making new courses.
